Send a fax
AI-generated summary
Genesys Cloud enables users to send faxes directly from the Calls sidebar using files stored on their computer or in the Documents repository. The platform supports fax documents up to 100 pages and 10MB in size, with compatible file types including .tiff, .pdf, .doc, .docx, and .odt. Users can send only one file per fax transmission and must ensure documents are not password-protected. The faxing process allows users to enter a recipient fax number, optionally include a cover page with custom notes (which automatically displays the date, time, recipient number, sender number, and any added notes), and initiate transmission via the Fax button. Fax status appears in the Active Calls section, and users receive email notifications confirming transmission status. Sent faxes can be viewed in the user's personal workspace, though only successfully transmitted faxes appear there. Users can access the fax feature through the Calls sidebar or by hovering over files in Documents and selecting the Share > Fax option. Required permissions include Conversation > Call > Add and Conversation > Fax > Send, along with a selected phone. For documents exceeding size limitations, Genesys recommends dividing them into smaller parts before transmission.
- Conversation > Call > Add permission
- Conversation > Fax > Send permission
- A selected phone
Send files saved on your computer or stored in Documents as a fax.
Notes:
- Genesys Cloud supports fax documents of up to 100 pages and 10 MB. If you must send a longer document, Genesys recommends that you divide the document into smaller parts.
- Documents to be faxed cannot be password-protected.
- From the sidebar, click Calls .
- From the Menu bar, click Calls .
- Click Send Fax .
The Send a Fax window opens. - Enter the fax number. Notes:
- To open the Send a Fax window, you can also click an external organization’s fax number. Genesys Cloud copies the number into the appropriate field.
- To share files with other users without sending a fax, use the share a file feature in Documents.
- Choose whether to include a cover page with your fax. If you include a cover page, you can make a note to include on the cover page. The cover page includes the date and time, the recipient’s number, your number, and any notes you made.
- Click Browse Your Computer…
Alternatively, click Browse Genesys Cloud Documents….Note: Genesys Cloud supports faxing the following file types: .tiff, .pdf, .doc, .docx, and .odt. - Select the file that you want to fax. Note: Genesys Cloud currently only supports faxing one file at a time.
- To send the fax, click Fax .
The status of your fax appears in Active Calls.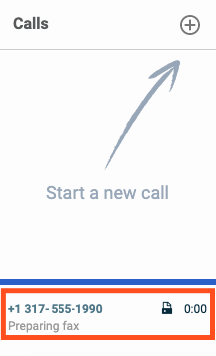 Notes:
- Genesys Cloud also sends you an email with the status of your fax.
- View sent faxes in your personal workspace.
You can create and send a fax of a file stored in Documents.
Note: Genesys Cloud supports faxing the following file types: .tiff, .pdf, .doc, .docx, and .odt.
- Find a file in Documents.
- Hover over the file you want to fax, click Share > Fax. Genesys Cloud inserts the file into a fax in the Calls panel.
- Enter the fax number.
- Choose whether to include a cover page with your fax. If you include a cover page, you can make a note to include on the cover page. The cover page includes the date and time, the recipient's number, your number, and any notes you made.
- Click Send FAX . The status of your fax appears in the Active Calls column.Notes:
- You can view sent faxes in your personal workspace.
- Only successfully transmitted faxes appear in your workspace.
- Genesys Cloud also sends you an email with the status of your fax.
[NEXT] Was this article helpful?
Get user feedback about articles.